Tuesday, February 28, 2012

Making Process Of Polo-shirt. (2nd part)

Learn Apparel Merchandising, Learn Fashion design.
After receive all the raw materials.

7th Step


Sewing Section: As in our following this style has no print & embroidery so the cut fabric will be go to input section directly. Merchandiser should sit for a PP meeting with production department with the approved trim card, PP sample, Accessories in house report. Production department should discuss with planning department for production target.


a) Placket Making: Production supervisor will made the placket by the help of sewing operator. At first they will fused the fabric with interlining in fusing machine. After that, they will cut the fabric by use of the pattern of placket. After that, they will marked the placket fabric & stitch with a plain machine.


b) Pocket Joint: In between of the placket making we will attached the pocket with body by use of a plain machine. Regarding the pocket please be careful about placement of pocket. Sometimes sewing operator sew it slanted & wrong position.


c) Placket Make & Joint : After making the placket & joint the pocket with body,  the body has goes to next plain machine operator to attached the placket with body. Here normally we used two plain machine.


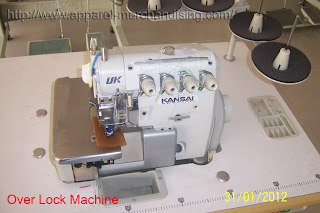
d) Shoulder Joint: After the placket joint we joint the shoulder (front & back part) by use of a over lock machine.


e) Shoulder Top Stitch: After shoulder joint we put a top stitch over the shoulder by use of another plain machine.


f) Collar tack & Joint : After the shoulder top stitch at first we tack the collar by use a plain machine then we join the collar with body by use of a over lock machine.


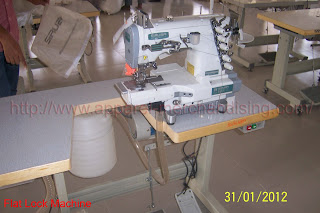
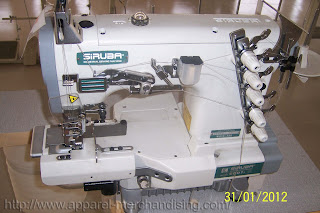
g) Back tape joint: After collar joint we joint the back tape in the flat lock machine by used of folder.


h) Placket Top stitch: After back tap joint we put placket top stitch by use two plain machine.


i) Placket Box: After the top stitch of placket we make the placket box by use of plain machine.


j) Main/size label attachment: After the placket box making we attached the main/size label inside the back tape by use of plain machine.


k) Sleeve rolling/ sleeve hem: In the mean time we roll the or hem the sleeve with flat lock machine.


l) Sleeve joint: Now we will joint the sleeve with body by use of over lock machine.


m) Side seam joint: After these operations we joint the both side seam of body & sleeve by use of over lock machine. We also attached the care label in between this operations.


n) Bottom hem: After the side seam joint  we hem the bottom  by use of a flat lock machine.


o) Sleeve (opening)Tack: After these process we put a tack in sleeve opening.


p) Button Hole: Then we make hole on the placket by use of button hole machine. In this regards please note that button hole will be little bit smaller then the button dia (ligne). Also be noted top button hole will be horizontal where as the others button hole will be vertical. However, you should confirmed it with your buyer.

q) Button Stitch: After button hole we will be attached the button with placket by use of button stitch machine. Please note that, many time buyer asked for extra button. If needed then we will also stitched a button with the body.

Regards
Bipul

Read my next post  regarding Finishing section.

Making Process Of Polo-shirt. (1st part)

Learn Apparel Merchandising, Learn Fashion design.
Dear All,

Today we will learn how a garments factory make a polo shirt. Here you will see some video of some special process. However, I will also try to describe you all the points in details.

Details of the style
  • Item: Men's Polo shirt
  • Fabrication: 100% cotton, Single Jersey, 160/170 gsm, 
  • Flat knit collar
  • Pocket at front left chest.
  • 02 (two logo button with pearl plastic quality, 20 ligne)


1st Step
Prepare the fabric booking : After approval of fit sample & received the final PO sheet from buyer, pattern/cutting section will make a correct pattern set of all the sizes. In middle class factory normally merchandiser do the consumption with the help of cutting master after placed the pattern of on marker paper. In this regards please always remember one thing if the orders qty is with size wise ratio then you must consider it during the making marker with pattern. I will discuss more details regarding the marker in near future. After get the consumption & dia confirmations merchandiser will booked the fabric and hand over the color & construction wise fabric break up sheet to fabric department. During this merchandiser should provide them all the lab dip approval with other instructions. Please also booked the collar & cuff.


2nd Step
Prepare the Accessories booking: In same time of booking  the fabric merchandiser also should booked the accessories. Merchandiser should ensue that, the store will receive all the sewing accessories before in house of the the fabric. Sewing accessories means - Sewing thread, main/size label, care label, tape etc. Merchandiser should always follow up the sewing production because when a minimum qty will be output he should try to book the finishing accessories like as - Poly, Carton etc. Before booked the poly & back board he must confirm the folding way with buyer. Also merchandiser should take approval of shipping mark, sticker & carton quality from his buyer. Some others accessories like as - hang tag, hang tag string, thinner, spot lifter, inter lining, he must booked these at the same time of fabric booking. After received these trims he should make a trim card and distribute to all the sections. Store department should count & check the quality of all the accessories before start sewing production and also provide a inventory report to merchandiser.

3rd Step
Production planning: After placing all the booking he should discuss with the planning for a production planning. Maximum middle class factory do not follow this procedure.


4th Step
Quality check of fabric: After receive the fabric from dyeing the fabric Q.C department will check the color shade, Gsm,  dia, shrinkage, twisting etc and acknowledged the merchandiser accordingly. The fabric q.c team will also check the count the collar & check the others quality. A middle class factory need a strong  quality team for fabric because normally they do the dyeing in others factory.


5th Step
Fabric Cutting: After receive the green signal from fabric q.c team and merchandiser, cutting section will be start trial cutting at first. At the same time cutting section will check the consumption again in real fabric. They will confirm to the merchandiser that how pcs they can be able to cut from the received fabric. It is very important because some time we need extra fabric due to the increased of fabric GSM. Merchandiser should re booked the short qty fabric if needed.


6th Step
Size set & PP sample: After received the bulk fabric production section will make size set sample and check the measurement & shrinkage of fabric. After checking the size set sample they will adjust the pattern and will be make a pre production sample for buyer approval. During the size set sample production department will setup the line layout. Step 5th & 6th will be done at the same time.

Regards
Bipul

Read my next post regarding Sewing process.

Saturday, February 25, 2012

Machine Wise Sewing Operation (knit Items)

Learn Apparel Merchandising, Learn Fashion Design.
Some Common Machine wise Sewing Operations.


From my this post you will got a common list of sewing operations based on knitted items. 


Plain Machine
  1. Placket Rolling
  2. Placket Box
  3. Nose Tack
  4. Neck Tack
  5. Sleeve Tack
  6. Neck Rib Tack
  7. Collar Top Stitch
  8. Neck Top Stitch
  9. Pocket Join
  10. Side Band Top Stitch
  11. Label Join.


Over Lcok Machine
  1. Shoulder Join
  2. Sleeve Join
  3. Side Seam
  4. Neck Join


Flat Lcok Machine
  1. Shoulder Top Stitch
  2. Armhole Top Stitch
  3. Neck Top Stitch
  4. Sleeve Rolling
  5. Bottom Hemming


Please be informed that, the above list is not a complete list. 


Regards
Bipul 

Thursday, February 23, 2012

Some Common Fabric (Knit) Problem

Learn Apparel Merchandising, Learn Fashion design.
Dear All,

During the production of a knitted items, our first step is producing the fabric. Fabric producing means Knit the yarn with knitting machine to make the specific fabric in grey form. Then we dye the grey fabric in our require color in dyeing section.

Actually fabric producing is the main & most important step for a knit items. In the fabric producing section very often we get many kinds of problem.  Please find below some common problem of them -

Common Problem of Fabric (Knitting & Dyeing)

  1. Shade Variations.
  2. Color Spot
  3. Creased Mark
  4. Soil Mark
  5. Running Shade
  6. Dia Problem
  7. GSM Problem
  8. Shrinkage Problem
  9. Twisting 
  10. Fabric Hole
  11. Sat-up
  12. Slab Yarn
  13. Foreign Yarn
  14. Oil Spot
  15. Needle Mark / Ass Mark
  16. Sinker Mark
  17. Squeezer Mark.
  18. Pat-ta
  19. Naps
  20. Dead Fiber
These above problem can be raise from knitting, as well as from dyeing also. Such as - Creased Mark: If we use mix needle in the knitting machine then we will found this problem, also if we take long time before start squeezer or take long time in the dyeing winch than normal period then creased mark may arise. 

Also if the fabric stay in the winch at idle position of the machine or stop the machine for power failure or any other reason then Running shade can be arise. Others hands the poor scouring is caused of running shade. 

Please note that, very soon I will try to describe briefly the above problem with picture. 

Thanks & best regards
Bipul
  

Tuesday, February 21, 2012

Short details of Trims list.

Learn Apparel Merchandising, Learn Fashion design.
Dear All,

We know the main and most important things of a garments are fabric. Correct fabric booking is very important for apparel merchandiser. Print & embroidery are also very important for garments. However, except these items we also use so many items in garments. Today I will describe you a short details of these important items. This is also very important for apparel merchandising.

Trims: During the making and exporting process of a garment we use many kinds of items other then Fabric, Print & Embroidery. We called these items as trims. Trims cover all the items used in the garment except the basic fabric. There are hundreds of items used to manufacture the garments, Proper selection of trims and its quality are very important for styling, otherwise the garment may be rejected or returned by the customers.

Please find below a short list that covers some names of the trims:

1. Sewing thread: The main & most common trims are sewing thread. Normally buyer asked the matching color sewing thread. In garments production normally we used 100% spun polyester thread, 100% cotton thread, Filament thread etc. The polyester thread shade is color fastness. Tensile strength. Elasticity, Shrinkage, Moisture Regain, abrasion, Resistance etc these are some quality of sewing thread. 50/2 is the most common count sewing thread normally we use it in T-shirt. 40/2 & 40/3 count sewing thread is also available in market. Normally we use these thicker thread in heavy garment like as sweat shirt, jacket, trouser etc. The price of 40/2 yarn is higher than 50/2.


2. Zipper: From the zipper factory we can get various kind of zipper. We can categorize the zipper by following points as mentioned below


a) Teeth: Nylon teeth, Vislone teeth, Metal teeth etc.


b) Color: Tape color, Teeth color.


c) Size: #3, #5 & #8 etc.


d) Function: Auto lock, Semi auto lock, Hidden zipper, reversible, Open end (O/E), Close End (C/E) etc.


e) Length: As per requirement 18 cm, 66 cm etc.


3. LABELS: Main, Size, Care (Polyester care label & Nylon or paper care label), Content, price, patch etc

4. BUTTON : Pearl plastic button, 02 hole button, 03 hole button, 04 hole button, custom button shape, Horn button, Shang button, Metal button, logo button, non logo button etc.

5. ELASTIC : Cotton elastic, Polyester elastic, 400 denier, 700 denier, 1 cm width, 1.5 cm width, 3 cm width etc.

6. EYELET : Antique, Matching color, Matt silver, Antique Silver, 22 mm dia, with logo or w/o logo, emboss logo, engraved logo etc.

7. SNAP BUTTON: Snap button, press button, 4 part snap button, male part of snap button, female part of snap button, antic color, Silver color, matching color.

8. VELCRO : Hook & Pile, Matching color.

9. STRING/CORD : Cotton, Polyester etc.

10. PLASTIC CLIP

11. Tag pin: Clr – White, black, transparent, 3 cm, 6 cm, 8 cm, 12 cm etc.

12. TAGS : Price tag, Hand Tag, Brand Tag etc.  

13. STICKER : Hook & Pile etc.

14. HANGER: BDS hanger, t-hanger, 28 cm, 34 cm, Transparent, Semi transparent, Solid color etc.

15. Hanger size ring: Size ring of hanger, Size print etc.

16. POLYBAG (0.80 mm) : Strength : Chemical Mixture. Thickness (micron/mm: 1mm = 1000 micron) Elasticity Transparent, LDPE (Low Density Poly Ethylene), PP (Poly Propylene), Adhesive, with hole, warning, size, recycle logo etc.


17. BLISTER BAG (.05 mm): Loaded capacity is higher than polybag

18. SCOTCH TAPE

19. GUMTAPE: With logo print, none logo, Khaki color, transparent color.

20. CARTON: 3ply, 5ply, Size (L,W. H), gum pasting, PP belt, metal stitching, divider, bottom, shipping mark etc.


21. Interlining : Crash lining, soft lining, Hard lining etc.

22. Silica: For controlling the moisture in the carton. 


23. Shoulder tape: Cotton, Polyester etc.

Above list just for a Idea not a complete list. There are so many items are still remain. I will try to describe more details regarding the above items very soon.

Regards
Bipul

Monday, February 20, 2012

Sweater Consumption & costing

Learn Apparel Merchandising, Learn Fashion design.
Dear All,

Please find below a comments & its answer which is related with sweater consumption

"""""
RAHMANJan 18, 2012 09:19 AM

Pls tell me , how can i consumption for sweater yarn per dozen ?. and show me sweater consumption formula ?.
"""""

"""""

tamimFeb 15, 2012 05:47 AM

Dear Bipul Bhai

Seeking your permission for allow me to share the answer of Mr. Rahman's Question . if i make any mistake pls correct it .


Sweater don’t have solid or finished fabric like Woven & knit item, by linking one yarn with another the shape of the different part of sweater is made. so that there is no such consumption formula for sweater like knit & woven item .

For costing of sweater, we need to make a sample first as per customer required style, measurement & weight . It is wise to make the sample following the middle size of customer spec. Then weight that sweater & multiply the weight with 12 pcs to know the weight of per dozen sweater. Then add wastage percentage (Generally we calculate 10-20% wastage based on styling). This way we can found the sweater consumption

In the view of above the sweater costing formula will be like as below….

= Yarn weight (in LBS / dzn Garments ) + wastage X price of yarn /lbs 

= Result of usable total yarn  cost


Costing :-

  1.  Yarn :- Total usable Yarn cost/dzn 
  2.  Add total Accessories cost /dz 
  3.  Add Print/Emb.(If any) / dz 
  4.  Add Zipper cost (If any) / dz
  5. Add Button cost (If any) / dz
  6. Add CM (CM based on styling and gauge) /dz
  7. Add Commercial cost / dz
  8. Add Profit /dz
Then divided the price / 12 Pcs & you will get price / pc


Example: -

Say, 
Weight of following sweater is 8 lbs/ doz (12 GG basic Style)
Wastage is 12% of total weight = 0.96 lbs / doz
Yarn price  is $4 /lbs
Basic Accessories cost is: $5 / doz
Print cost : $ 0.65 / doz
Zipper + button cost : $1 / doz
CM : $28 / doz
Commercial cost : $2 / doz


Now the costing formula will be 

=  (Total usable yarn in lbs + 12% wastage ) X Yarn price/lbs + Accessories cost + Print cost + Zipper & button cost + CM + Commercial cost

= (8 lbs + 0.96 lbs ) X $4 + $5 + $0.65 + $1 + $28 + $2

=  8.96 lbs X $4 + $5 + $0.65 + $1 + $28 + $2

=  $35.84 + $5 + $0.65 + $1 + $28 + $2

= $ 72.49 / dozen

Then divided by 12,   

$ 72.49 /12 Pcs  

$ 6.04/pc FOB .

Now add your profit & submit the quotation to buyer. 

Posted by 
Tamim

Thursday, February 2, 2012

Making process of a Sweater

Learn Apparel Merchandising, Learn Fashion design.
Summery of full process for Making a Sweater.

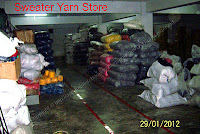
1st step: Yarn Purchase - As per buyer requirement we will purchase the yarn from yarn supplier. It can be local or foreign yarn. Before purchase the yarn we must need clear idea regarding the wastage percentage of the each types yarn. Normally the wastage percentage of cotton & acrylic is 5% to 7% and for the Viscose, Spandex, Wool etc is 10% to 12%. After in-house the yarn we should store yarn by their types & count.


2nd step: Winding Section - After receive the yarn from supplier we need to winding these yarn by coning machine for knitting production. We should also take care here from mix-up the yarn.


3rd step: Yarn distribution Section - After winding the yarn it goes to yarn distribution section for distribution the yarn to the knitting floor.  Here we must ensure that, the correct yarn is distributing for correct gauge knitting machine.


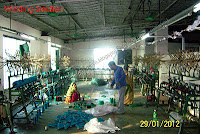
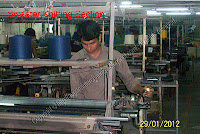
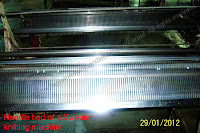
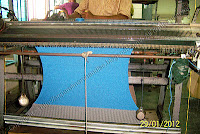
4th Step: Knitting Section - In Knitting section we should knit the body, sleeve etc of the sweater by knitting machine. The operators of knitting machine are called as knitting man. If the sweater is with placket then we will make the placket by auto placket machine.


5th Step: Knitting Inspection Section - After knit the body parts, it will be inspected by the Q.C team in the inspection section.

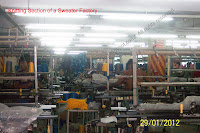
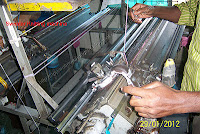
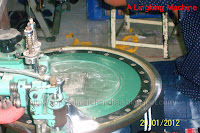
6th Step: Linking Section - After pass the Q.C check, the body parts will be goes to the Linking section. In this section we join the front part, back part, sleeve etc with the Linking machine.


7th Step: Linking Inspection Section - After linking the body parts, it will be inspected by the Q.C team in the inspection section.

8th Step: Trimming section – In this section the body will be trimmed.


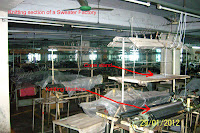
9th Step: Mending section – From trimming section it will be goes to mending section for mending.

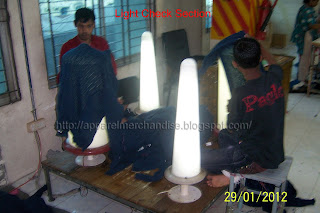
10th Step: Light check section – After mending, the body goes to Light check section for light checking.


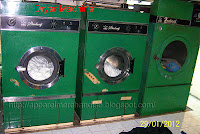
11th Step: Wash section – In this section we washed & dry the sweater. Then we send it to the Iron section.


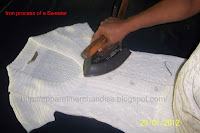
12th Step: Iron section - Here we iron the body.


13th Step: Iron inspection section – After ironing the body we inspect the iron quality in this section.

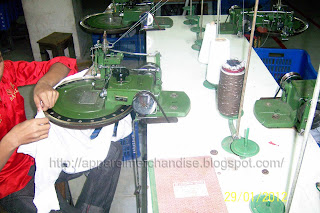
14th Step: Label attaching section – After iron check we attached the label with the body by sewing machine.


15th Step: Quality Section – After attached the label with sweater, quality team check all over quality. It’s called final quality.  


16th Step: Packing section – After the final check we sent the sweater to packing section for poly & carton. After make the carton ship out the goods. 


Regards
Bipul
Related Posts Plugin for WordPress, Blogger...